Growing the Movement through Street Chalking

If you’re already set to get started chalking, check out our stencil files here! If you still need some convincing or guidance, read on:
There are many different ways to make a message heard, and they all have their benefits and drawbacks. Weekly newsletters allow us to send a comprehensive message to people who have already signed up or searched for our blog. For the movement to grow, we also need to reach people who aren’t looking for us; and to get their attention, we need to get in their faces.
Chalking is one way to reach an audience that’s difficult to reach by other means. Eye-catching chalked messages on public walkways pull people out of their daily rhythm, as they’re headed to work or wherever else, and give them something to ponder or to look up online later. If we can scale up so that our chalked messages are present around our communities and around the state, we also start to create an impression of ubiquity; if we’re everywhere, we can’t be ignored.
It’s important to think about where a chalked message is best positioned to create that ubiquity; using walkways that get a lot of foot traffic maximize the reach of your message. Also, remember that chalking is, by its nature, an ephemeral medium—the message will only last until it wears away or until rain washes it off. You can extend the life of your message by placing it on surfaces that will be least susceptible to the elements; seek out areas that have some coverage from the rain or sun, or adjacent to areas that people walk over, instead of placing messages where they’ll get stepped on.
A chalked message, however, must be short. Since we only have a very brief window of attention to get in people’s minds, messages should be clear and distinct and chosen carefully. Choose messages that will stick in people’s minds, either because the cadence makes it memorable, or because it references well-known phrases, or through other design elements. Also, try to include a name or website, so that people can follow up with an online search to learn more.
Does all this sound daunting? Don’t worry! Mass 50501’s Street Art Team learned a lot of this through testing the best ways to create chalked messages in a scalable way. Read on to find out how to make your own stencils and for some suggested messages to include. If you go out and chalk your area, send us photos! We’d love to include them in future content.
How to make stencils
There’s no right way to make stencils, but here are three methods that worked for our team. Of course, if you have a cutting machine, like a Cricut, then you already know what to do. Go make some stencils!
Method 1
Design the stencil on the computer
Print it out on 8.5 x 11 paper
Buy semi-transparent plastic posterboard at an art/stationary supply store
Tape the posterboard over the print
Cut out the design with a hobby knife
Method 2
Buy regular posterboard and stencil letters
Trace the stencil letters to write your message
Laminate the stencil so it won’t get soggy
Cut out the design with a hobby knife

Method 3
This method is quite technical but fastest for making many copies of the same design.
Design the stencil on the computer using vector graphics software like Inkscape
Export the design into .svg or .dxf format
Buy thin, like 1/16”, sheets of plastic. Derlin works, among others, but not all plastics are safe to use in the machine so ask before you buy.
Go to a maker space or hobby shop and use their laser cutter to cut out the design.

What chalk to use
The ideal chalk to use is spray chalk, found in the “outdoor summer activities for kids” aisle of Michaels and possibly department stores. But that is not the only option! We experimented with several methods and report the results below.

Criteria
Easy to use: The artist can apply it quickly and move on. Doesn't need to carry a bunch of messy stuff.
Outcome quality: The image is clear and readable despite rough surface, with little/no bleed.
Temporary: It doesn't come off if it rains lightly, but does come off if it rains hard or someone wants to wash it off.
Findings
Spray chalk: by far the best out of everything we tried, excels in all three of the above criteria. Downside is, it's harder to find, pricier, and aerosols are bad for the environment.
Hand chalk: it's slow to color in the stencil by hand; otherwise the result is almost as good as spray chalk.
Chalk juice: (chalk powder dissolved in water) - poor quality; bleeds under the stencil, makes an unreadable blob.
Chalk paste: (chalk powder with just enough water to be a paste) - quality was ok, it was slower to squeegee the paste on, and some places with rough texture got paste under the stencil. Sort of messy.
Adding Acrylic Paint: as an alternative to hairspray, add just a few drops of acrylic paint to chalk juice or chalk paste; made chalk last longer but left slight staining.
Marking Spray: (the stuff from the hardware store) - Do Not Use! Too sticky, too long-lasting, NOT washable; might as well be spray paint
Joint Compound: (aka drywall plaster or spackle) - worked well, smooth consistency of the plaster made it much easier to spread than chalk paste. It was hardy to "shower" but washed away with the "jet" setting of a garden hose.
Spraying technique
Apply spray chalk with smooth sweeping back and forth motions.
Avoid slowing down or hovering over a spot or you will spray too much and it will run.
It will dry much brighter than it looks when wet. Remember, if you use too little you can always spray more, but if you spray too much you can’t take it back.
“Think of it as if you’re applying body glitter, not sunscreen”
Consider doing a demo spray for your participants so they don’t waste the spray from poor technique.
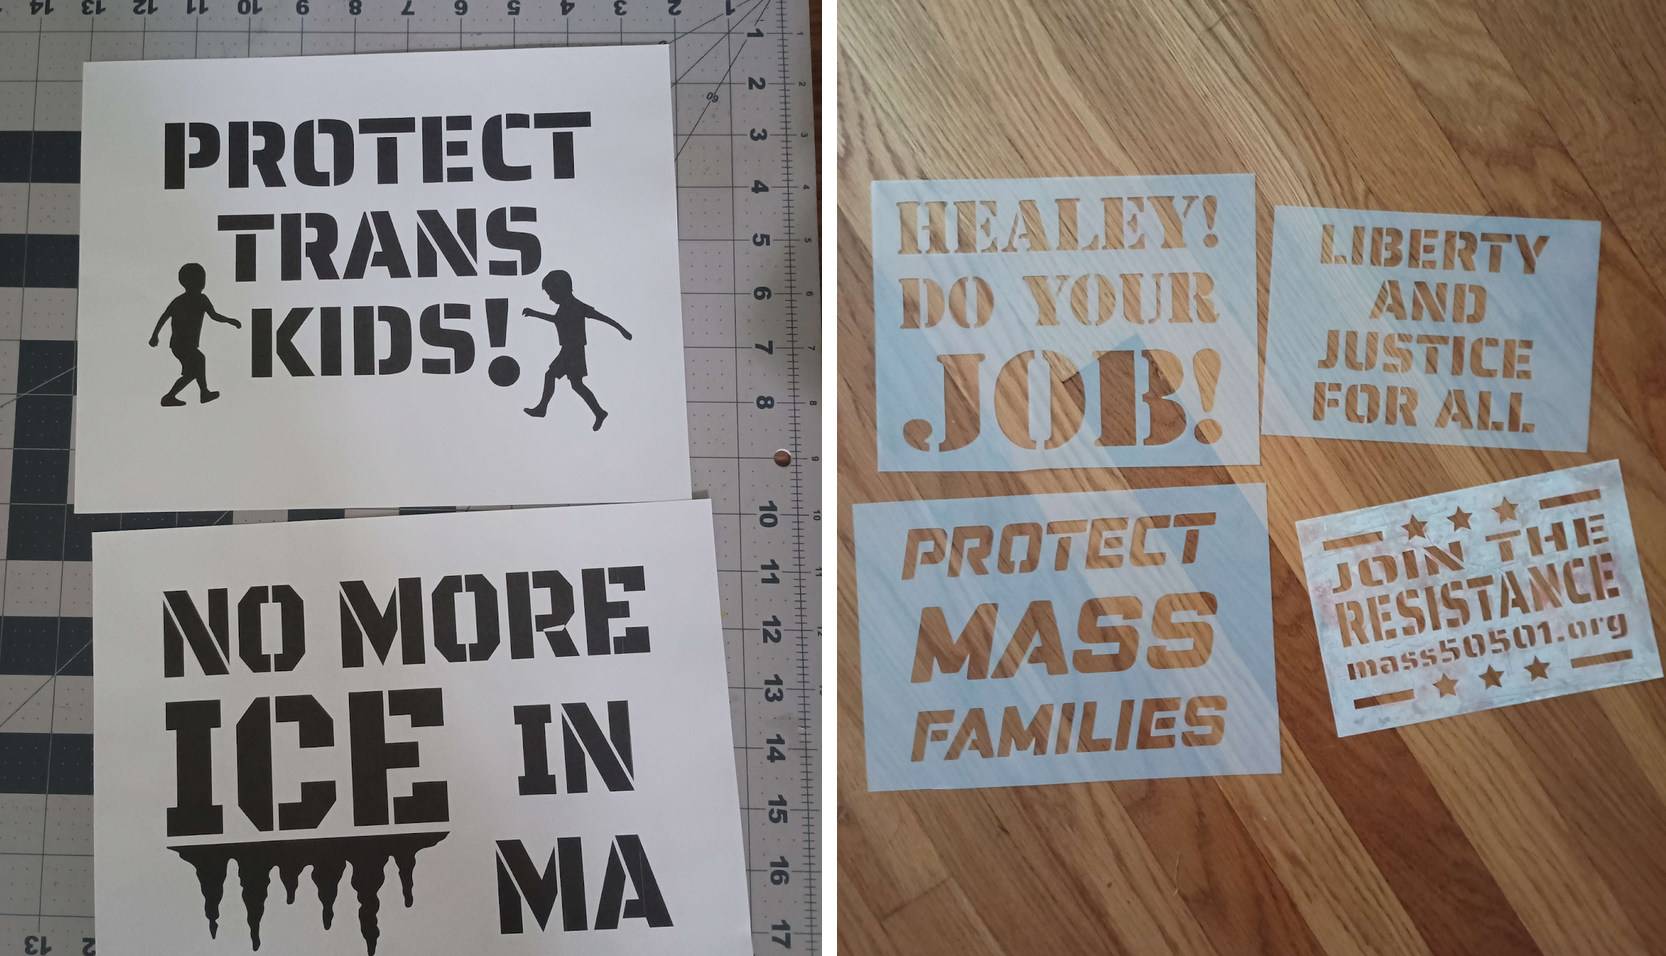
Sample Slogans
No ICE in MA
Protect Trans Kids
Protect Immigrants
Make Good Trouble
Redeem America
Liberty and Justice FOR ALL
Whose Streets? Our Streets!
Whose House? Our House!
No kings (with crown)
Protect immigrant rights!
Power of the People >The people in power
No Hate!
Lessons Learned
Stencils help guide the participants to stay on message for the given event. (Versus free-hand chalking which is very open-ended.)
Spray over your artwork with hairspray to make it last longer.
That’s it for now! If you want to help spread the message, go make a stencil, or help yourself to one of ours. These files are ready to be printed and cut to create ready-to-spray stencils. Enjoy, and check back once in a while as we may add more designs.

Enjoyed this article? Get updates on the movement, volunteer opportunities, and more by clicking below.